Complete Member Editing
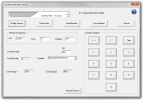
In order to change the entire shape of a member, create a new member, add special features to a member, or manage custom members, it is necessary to open the Complete Member Editing window.
Note: Any change will take effect immediately in the Member List and Member Tree tabs. However, the Optimised tab will only be updated at the next optimisation.
 Edit a member
To edit a member, do the following:
- Switch to the Member List tab, if not already active.
-
Access the Complete Member Editing window by doing one of the following:
- Double-click the member you wish to modify.
- Select the member you wish to modify and double-click the member area on the Member Diagram.
- Right-click the member you wish to modify and select Add/Edit Member from the context menu.
-
In the Complete Member Editing window, do at least one of the following:
- Choose another member type from the drop-down menu at the top of the window.
-
Enter new parameters in the lower part of the window.
- Edit the special features of the member.
Note: You may need to check Enable Full Member Editing to expand the lower part of the window. You can click the description of a field to get additional information about that field.
-
Click
 to apply the changes.
Note: you can also click
 to save the modified member as a new member in the Member List, or click
  to save it as a new custom member.
 Create a new member
To create a new member, do the following:
- Switch to the Member List tab, if not already active.
-
Access the Complete Member Editing window by doing one of the following:
- Double-click anywhere in the Member List tab.
- Double-click the member area on the Member Diagram, whatever member is selected.
- Right-click anywhere in the Member List tab and select Add/Edit Member or Add New Member from the context menu.
-
In the Complete Member Editing window, do the following:
- Choose a member type from the drop-down menu at the top of the window.
-
Enter the parameters of the new member in the lower part of the window.
Note: You may need to check Enable Full Member Editing to expand the lower part of the window. You can click the description of a field to get additional information about that field.
- Edit the special features of the new member, if required.
- Click
 to add the new member to the Member List.
 Custom members
Note: Custom members are specific members saved separately for future use with any file. They are intended to be used as offcuts. For more details, see Offcuts.
 Create a custom member
To create a custom member, do the following:
- Switch to the Member List tab, if not already active.
-
Access the Complete Member Editing window by doing one of the following:
- Double-click anywhere in the Member List tab.
- Double-click the member area on the Member Diagram, whatever member is selected.
- Right-click anywhere in the Member List tab and select Add/Edit Member or Add New Member from the context menu.
-
In the Complete Member Editing window, do the following:
- Choose a member type from the drop-down menu at the top of the window.
-
Enter the parameters of the new custom member in the lower part of the window.
Note: You may need to check Enable Full Member Editing to expand the lower part of the window. You can click the description of a field to get additional information about that field.
- Edit the special features of the new custom member, if required.
-
Click
 .
. -
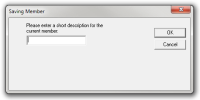
The following window pops up:
Enter a designation for the new custom member and click
 .
.
 Edit a custom member
Note: the designation and length of a custom member can be changed directly in the Offcuts tab of the Options window.
To edit a custom member, do the following:
- Switch to the Member List tab, if not already active.
-
Access the Complete Member Editing window by doing one of the following:
- Double-click anywhere in the Member List tab.
- Double-click the member area on the Member Diagram, whatever member is selected.
- Right-click anywhere in the Member List tab and select Add/Edit Member or Add New Member from the context menu.
-
Click
 .
. -
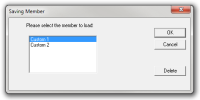
The following window pops up:
Select the custom member you wish to modify and click
 .
. -
In the Complete Member Editing window, do at least one of the following:
- Choose another member type from the drop-down menu at the top of the window.
-
Enter new parameters in the lower part of the window.
Note: You may need to check Enable Full Member Editing to expand the lower part of the window. You can click the description of a field to get additional information about that field.
- Edit the special features of the custom member.
-
Click
 to save the modified custom member as a new custom member.
 -
The following window pops up:
Enter a designation for the new custom member and click
 .
. - Delete the former version of the custom member, if required (for more details, see Delete a custom member).
Note: you can also click  at step 6 to save the modified custom member as a new member in the Member List.
 Delete a custom member
To delete a custom member, do the following:
- Switch to the Member List tab, if not already active.
-
Access the Complete Member Editing window by doing one of the following:
- Double-click anywhere in the Member List tab.
- Double-click the member area on the Member Diagram, whatever member is selected.
- Right-click anywhere in the Member List tab and select Add/Edit Member or Add New Member from the context menu.
- Click
 .
. -
The following window pops up:
Select the custom member you wish to delete and click
 .
.
 Special features
Depending on which member type has been chosen at the top of the window, some or all of the following special features can be added to the member:
- Single bevel cut on either side
- Double bevel cut on either side
- Birdsmouth cut
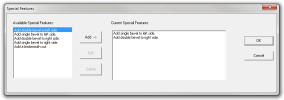
To access the Special Features window, click  in the Complete Member Editing window.
To add a special feature to the member, do the following:
- In the left part of the window, select a special feature you wish to add.
-
Click
 .
. -
In the case of a birdsmouth cut, the following window pops up:
Enter the parameters of the birdsmouth cut and click
 .
.
To remove a special feature from the member, do the following:
- In the right part of the window, select a special feature you wish to remove.
- Click
 .
.
To modify an existing birdsmouth cut, do the following:
- In the right part of the window, select a birdsmouth cut you wish to modify.
- Click
 .
. -
The following window pops up:
Enter the new parameters of the birdsmouth cut and click
 .
.
Once all the special features you wish to add to the member are listed in the right part of the window, click  to apply the changes.


